Over time, I've learned a number of things about flats.
Back at the start, I used the method described by DSS to create flats. I did everything from t-shirt flats on a sunny day to twilight flats to flats pointing at a computer monitor. I also reused the flats from session to session, believing that any rotation issues would not show up.
Eventually, I realized that reusing flats wasn't a practical thing to do and that I was doing a disservice to my efforts. I saw how dust motes were cropping up and were uncontrolled in my bad habits.
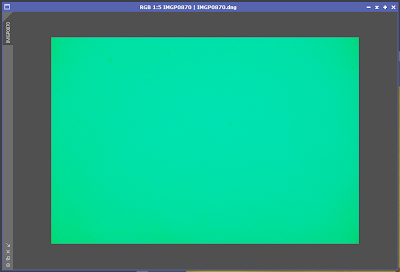
Here's an example of one of these early flats. Note how it looks in OSC and in the CCDI view.
|
|
Light Source
In 2011, I invested in a light panel with the thought that it would help. I'd seen others at the dark sites using EL panels built into boxes for making flats. I got a unit from Luminous Film that is pretty slick. It features 5000K temperature light so it would be good for "white" studio light. The design has a border of LED lights arranged around a shiny metal mesh reflecting the light in a uniform manner. Up close it's not very flat. At a distance and with some diffusion, the panel is flat. This is the device: http://www.knema.com/pages/edge-lit-led-panels I purchased one that is 6x6 so that it would be useful for the Mak and the SV4 and anything smaller.
I put a sheet of office paper on the panel to provide diffusion and have used it as the primary source for my flats. For the DSLR on the SV4, a good flat duration is 1/60 second at 100 ISO. This tends to overexpose the flat by one stop. I will still sometimes use twilight flats if I am too lazy to use the LED panel.
For twilight flats, I use a lexan sheet from TAP Plastics that I can put over the scope to filter the light. It keeps any bright stars from showing in the field of view. I think I picked up the sheet in the remnant bin for $1. Rarely I'll use both the lexan sheet and the panel, but that's not as big of a deal.
As a nice bonus, one of the Gemini II updates for the goto system provided a "Park at Zenith" function which really helps with flats. No more balancing the device on the end of the scope.
Look at how the light panel changes the flats as shot right after I got the device.
In examination of this example, I actually like how it is so well centered. I'd like to return to this position!
Calibration technique
Eventually, I found a different way to calibrate my images. DSS wasn't cutting it for me and I found that Maxim did a great job of processing the images. I also found some great pointers regarding how to use Set Calibration in Maxim, specifically for using OSC flats. Calibration using Maxim will be the subject of another post.
I also learned that to get the most out of the noise reduction technique, flats have to be fairly bright. This is very important when using light pollution filters. When using a filter, several channels will be dim, possibly adding noise to the mix. Thus, it's almost always good to expose the flat about a stop hotter than normal. This ensures that the flat will have every channel fully exposed.
Of course, this multiple channel awareness gets confused by Ha and other near IR wavelengths. These energies pass through the color filter array (Bayer filter) on the CCD sensor and end up exciting all the colors. This is especially important when using a modified sensor that does not have the CFA in place. In these cases, the alternative wavelengths will muddy the flat a bit.
Still, the flat should be usable as a monochrome channel file. Most calibration software will take the raw file and use just one channel to generate the flat.
Earlier in 2013, I stumbed across a post on the SBIG blog that was referenced on Cloudy Nights. In the post, they went into great detail about how near IR could be effecting flats because of how coatings can reflect these wavelengths.
The article is here: http://www.sbig.com/about-us/blog/flat-fields-the-ugly-truth/
Because of the article, I checked some of my gear and found that they glowed pretty brightly in the IR spectrum.
This eventually lead to my efforts with flocking as I was not prepared to paint (or repaint) parts near the optics.
Flexure and Centering
It was during this time that I was chasing the flexure bug.
I was hoping to eliminate camera movement with respect to the guide camera and was working on making things stiffer. I did eventually put the camera on a bracket that applied some tension to the system. Alas, it also provided a bias that made the camera off-center.
I will be continuing this work of changing the bracket to better secure the camera while balancing the need to align at the center. I've already made some progress.
See how the efforts of centering has made a difference just today:
|
|


Comments
Post a Comment